I used Earthboxes when I lived in a condo, which had a tiny outdoor space. All the vegetables did very well, and I could get a good harvest from them. However, they were put in storage when we moved to a single-family home with a bigger yard. Even though we have much bigger space to grow vegetables in GA, I have not been happy with my tomato harvest. Perhaps, the soil needs to be worked on in my raised beds. So, I got my EarthBoxes out of the storage and used it for tomatoes this year. Below is the progress.
All the seedlings that were planted in EarthBoxes were grown from seeds by me. Please check out this post about it if you are interested.
They are six different varieties of tomatoes. From the left, it is black cherry, rosella, cherokee purple, blue ribbon, momotaro, and saucy lady. All are indeterminate varieties except saucy lady. If I remember correctly, black cherry, rosella, and cherokee purple are heirloom, and the rest are hybrids. EarthBox recommends planting two tomatoes in each box. It is best not to mix with an indeterminate and determinate variety, but I didn’t know about saucy lady until I planted.
Each EarthBox was set up using Pro-Mix potting mix with recommended amount of dolomite and 1lb of 8-8-8 organic fertilizer. I also usually trim suckers, but I decided to let them be this year to see how EarthBox would handle it.
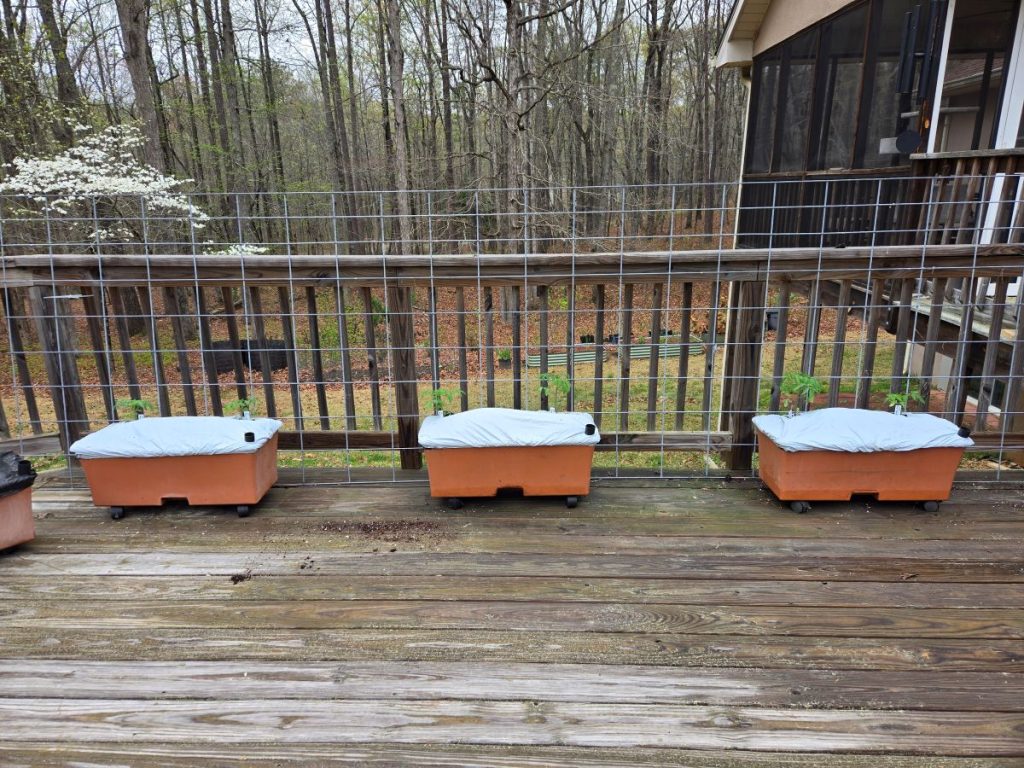
All seedlings were transplanted on March 30th into EarthBoxes. Our wood deck will get full sun from around 9 am until 5 pm during summer.
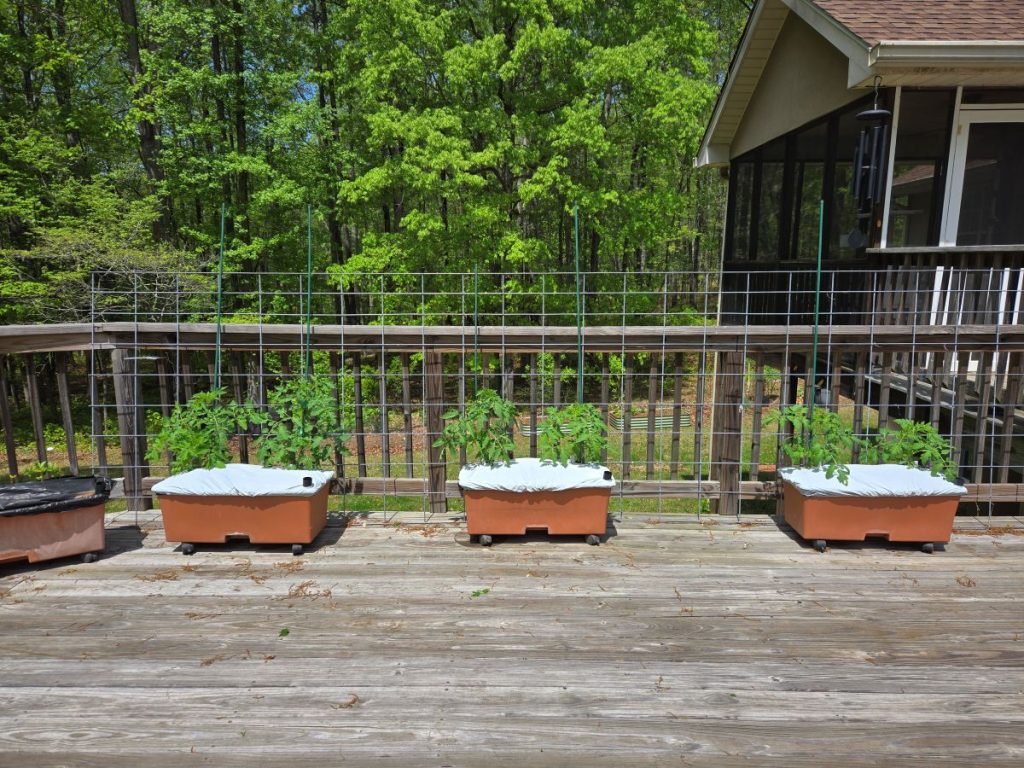
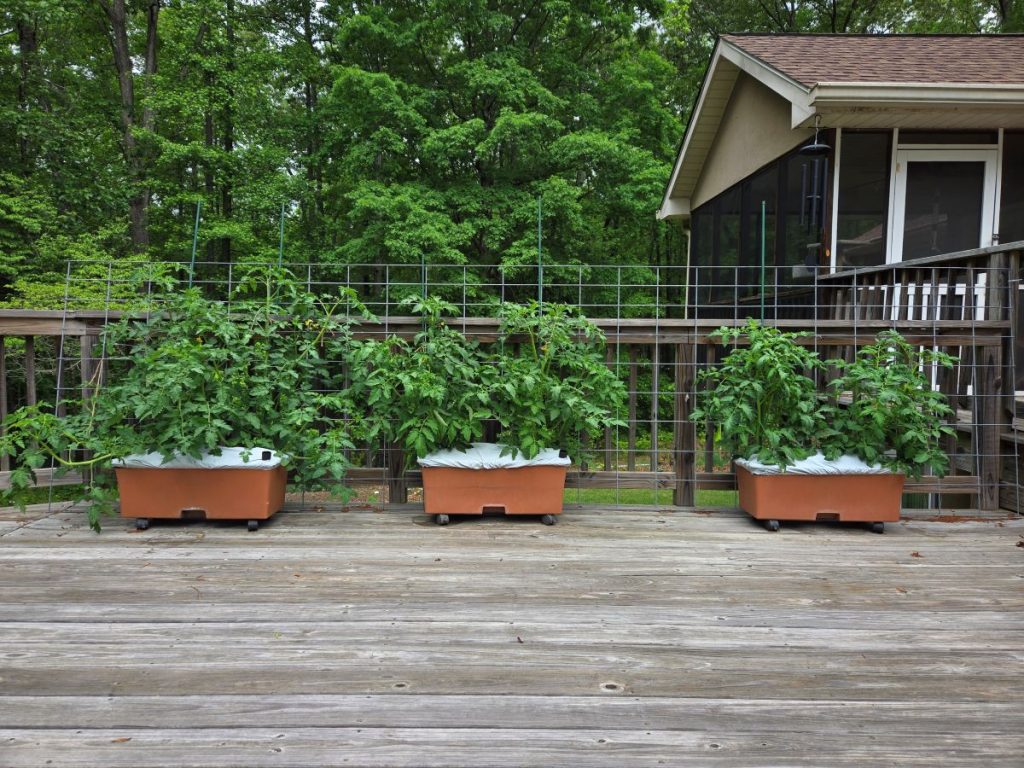
Cherry tomatoes on the left seemed to grow faster than big tomato varieties. In two weeks, there are significant growth in all of them. Perhaps, soil gets warmer quicker in container than in ground, which help them establish roots faster.
Only four days difference from above, but some of them are close to reaching the railing. I have a cattle panel leaning against the railing, and I have been tying tomato branches to them to provide support.
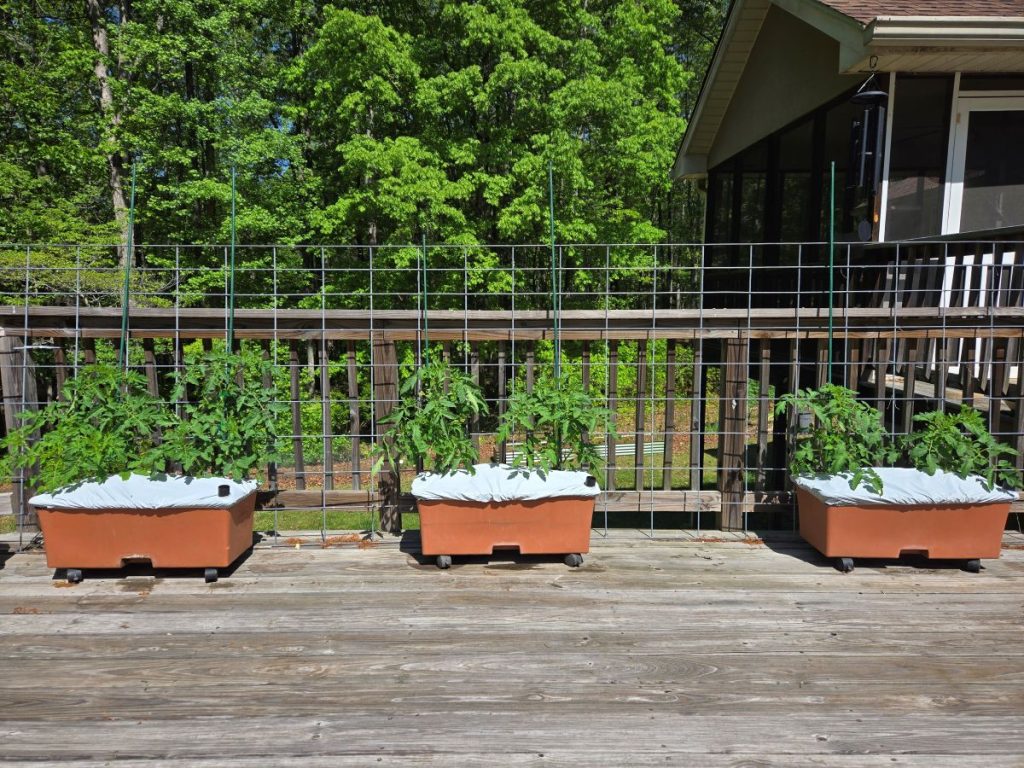
They are spreading to all different directions now. All of them are reaching to the height of railing. Lot of flowers and small tomatoes are seen especially with cherry tomato varieties.
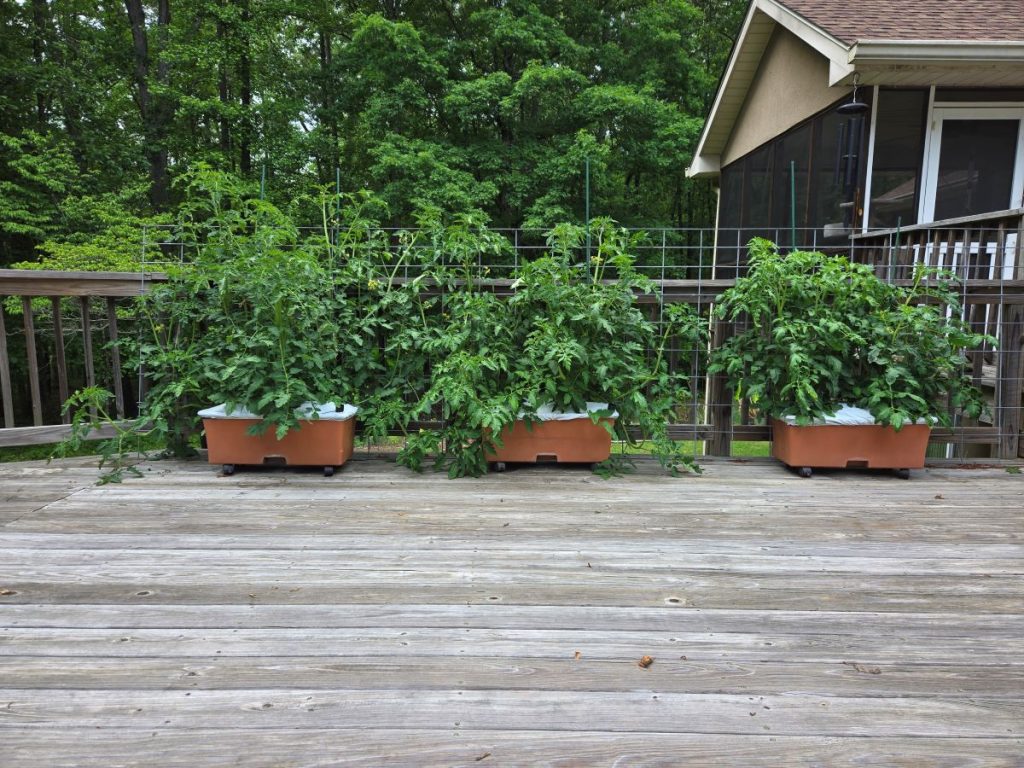
Some branches which were not tied to the cattle panel came down with rain and wind. I trimmed some leaves and suckers that were broken but decided to let some of them grow on the deck.
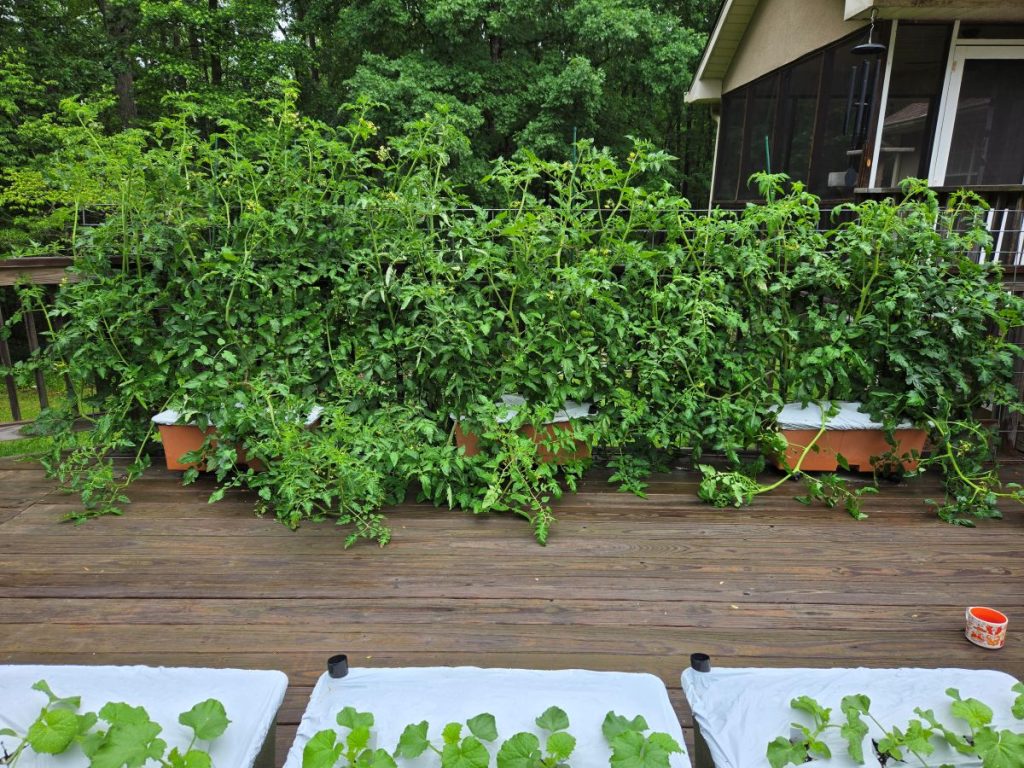
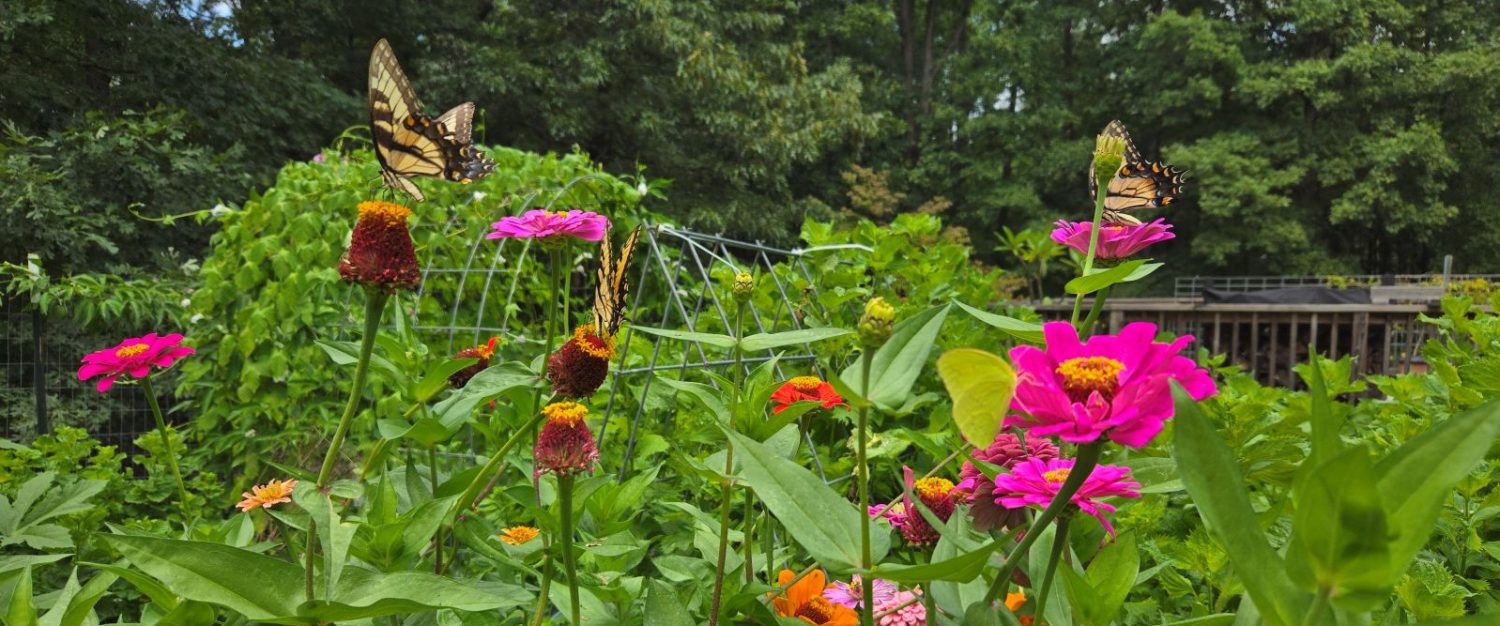
This is the growth of 1.5 months since they were planted in EarthBoxes. They are getting out of control. Lots of tomatoes are fruiting on all of the plants, and they are doing extremely well. I see some brown spots on some of the leaves in black cherry and momotaro. But overall, I am very happy with the growth of all these tomatoes.
I also added some more EarthBoxes for cantaloupes and melons, as most of them got eaten by some animals last year, and it was a disappointing harvest. I’ll report the progress on them as well.
Once tomatoes are ready for harvest, I’ll try to get the count of tomatoes from each plant. From what I have observed so far, I’ll grow tomatoes in EarthBoxes next year. Possibly peppers and eggplants as well.
If you are curious, this is the cost of breakdown for each EarthBox. For me, it was $22 as I already had three EarthBoxes. It may not be cheap especially if you are starting it from scratch, but an EarthBox can last for a long time (some of mine are 15 years old). Over the years, it can save you money.
- Original EarthBox: $43 (no added cost for me as I already owned them)
- Mulch cover: $2
- Pro-Mix potting mix (2.7 c.f.) – $18
- Dolomite: $2
- Fertilizer: $1 (I have a huge bag of organic fertilizers, and I used a fraction of it)
How is your garden coming along this growing season? Let us know in the comment section below.
Happy Gardening!